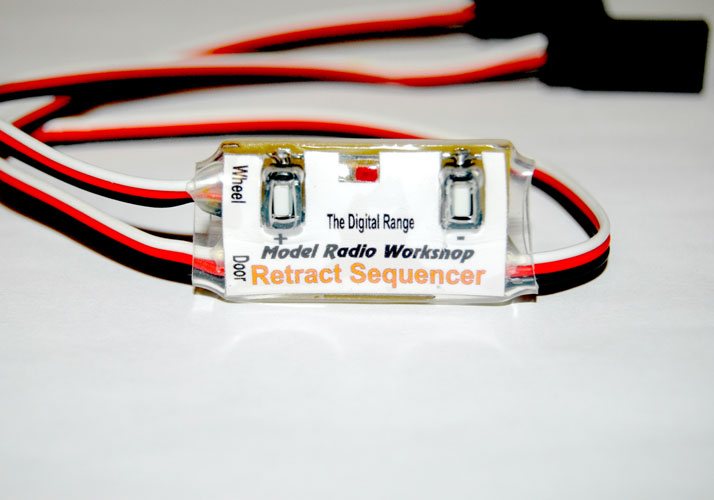
Model Radio Workshop Retract Sequencer for 2 Servos MRW17
Model Radio Workshop Retract Sequencer for 2 Servos MRW17 will be backordered from our supplier. Delivery will take between 3-5 working days & orders will be despatched once completed.
Description
Description
The Retract Sequencer allows you to control 2 servos (not included) in sequence for opening the doors and dropping the wheels in a controlled way in an aircraft. The speed and the position of the servos arms and the servo direction are all adjustable.
The Retract Sequencer allows you to control 2 servos in sequence for opening the doors and dropping the wheels in a controlled way in an aircraft. The speed and the position of the servos arms are all adjustable and including the servo direction.
FEATURES
- Retract “door” and retract “wheel” servos are both controlled by the retract switch
- Servo endpoints (travel) can be individually set between 150% and –150% on both servos
- Servo reverse is available on both servos
- The second servo will not start until the first servo has finished
- The transit time of each servo can be individually set between about 1 and 16 seconds
INSTRUCTIONS FOR USE
It is probably best to make initial adjustments to servo direction and servo travel before fitting the servos into the model. In addition, as the servo transit speed depends on the travel end points selected, set the travel end points before adjusting the speed.
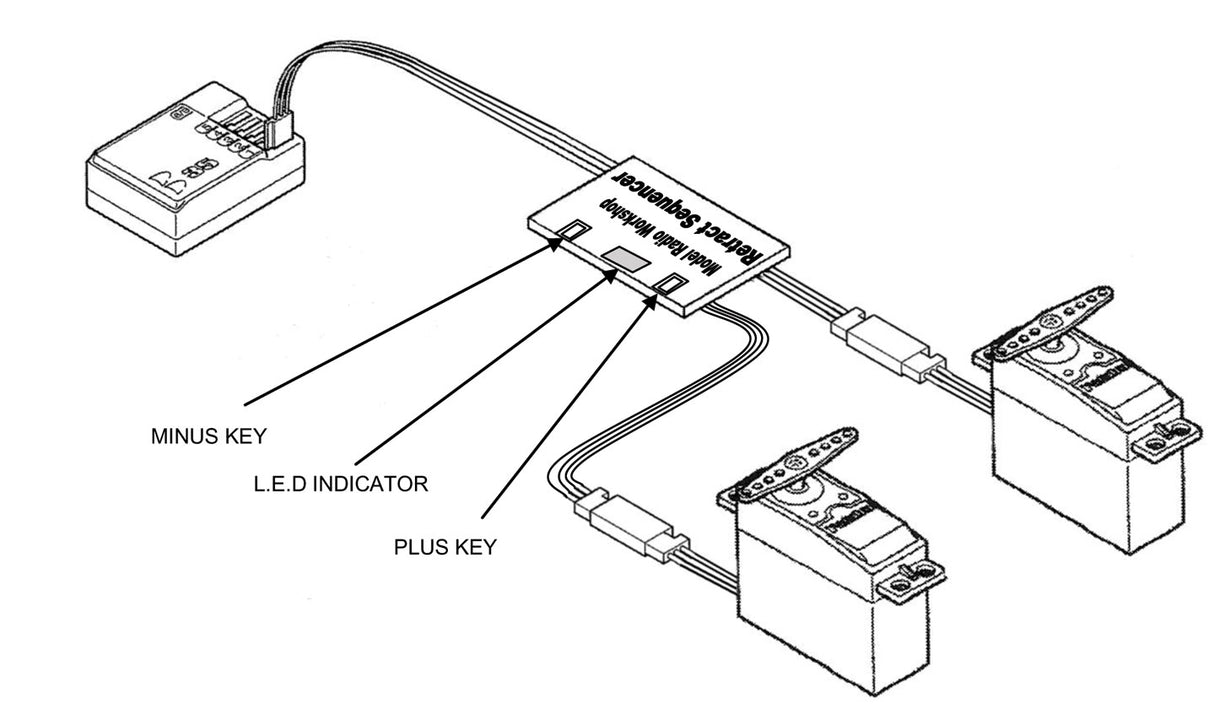
Plug the receiver flying lead on the Retract Sequencer into the retract (gear) channel on your receiver. The Retract Sequencer has two servo flying leads, “Servo1” and “Servo2”. Plug the “retract-door” servo into one connector and the “retract-wheel” servo into the other. Switch the transmitter and receiver on and switch the retract (gear) switch to your chosen “GEAR DOWN” position. The servos will move to the down position. Switch the retract (gear) switch to “GEAR UP” and note which servo moves first. The servo that moves first is the “retract-wheel” servo. Switch the retract (gear) switch to “GEAR DOWN “ and note that the other servo moves first. The sequence is – Door down then wheels down. Wheels up then door up. There is always a short pause before the movement of the second servo.
Please note that depending on the settings of your make of transmitter, “Servo1” may be either the “door” or the “wheel” servo. However, the first servo adjustment in the travel adjustment is always “Servo1” and the “ ” key will always adjust the “Servo1” speed. You must decide by inspection whether “Servo1” is the “door” or “wheel” servo. “Servo2” is always the second servo to be adjusted in the travel adjustment and the “-“ key always adjusts the “Servo2” speed.
Travel adjustment
Each servo endpoint position can be anywhere on the travel range from 150% to -150% so a separate reverse function is not needed.
Press the ” ” and “-” keys simultaneously for about a second to enter the “Servo1” travel set-up. The LED will flash rapidly while the keys are pressed and will light continuously when the keys are released to indicate that the “Servo1″ set-up is active. “Servo1” will respond to the retract (gear) switch at full speed. Move the retract (gear) switch to “GEAR UP” and use the ” ” key to move the servo in one direction and the “-” key to move it in the other to give the required “GEAR UP” position. Do the same with the retract (gear) switch in the “GEAR DOWN” position. Note that the selected position can be on either side of neutral, ANYWHERE on the travel range.
When this has been done, press the ” ” and “-” keys simultaneously for about a second to enter the “Servo2” travel set-up. The LED will flash rapidly while the keys are pressed and light continuously when they are released to confirm that the “Servo2” set-up is active. “Servo2” will respond to the retract (gear) switch at full speed. Move the retract (gear) switch to “GEAR UP” and use the ” ” key to move the servo in one direction and the “-” key to move it in the other direction to give the required “GEAR UP” position. Do the same with the retract (gear) switch in the “GEAR DOWN” position. Note that the selected position can be on either side of neutral, ANYWHERE on the travel range.
Finally, press the ” ” and “-” keys simultaneously for about a second to exit set-up. The LED will flash rapidly while the keys are pressed and go out when they are released to confirm that the new settings have been stored. The servos will move to the position set by the retract (gear) switch.
DO NOT FORGET TO EXIT THE TRAVEL SETUP
Servo speed
To enter the procedure for setting the servo transit speed, press and hold the ” ” and “-” keys and then switch the receiver on. The LED will flash evenly when the keys are pressed and flash asymmetrically when they are released to confirm that the speed set-up procedure is active.
To adjust the “Servo1” speed, press and hold the ” ” key. The LED will flash up to 8 times and then pause. Count the LED flashes from the pause and release the key when the required number of flashes have been seen. A single flash will give the maximum speed and a servo transit time of about a second. More flashes will give more delay (less speed) and with 8 flashes, the servo transit time is about 16 seconds. If you accidentally go past the required number of flashes, release the key and start again. The count always starts from one when the key is pressed.
‘The “Servo2” speed is adjusted in the same way by pressing the “-” key.
To exit the speed set-up, press the ” ” and “-” keys simultaneously until the LED flashes rapidly to indicate that set-up is complete. The servos will operate at the selected speed.
DO NOT FORGET TO EXIT THE SPEED SETUP
The unit remembers all settings and it is only necessary to adjust the servos initially and when making modifications.
Reset
To reset the unit to the factory defaults, plug it into an analogue channel. Switch the transmitter and receiver on and move the analogue stick from one extreme to the other while pressing the ” ” key. The LED will flash as the stick passes through neutral to confirm the reset.
SAFETY
Please ensure that the set-up keys cannot be pressed accidentally while the unit is in use.
Payment & Security
Payment methods
Your payment information is processed securely. We do not store credit card details nor have access to your credit card information.


